Like many growing content teams, we struggled with increasing demands for blog visuals and limited designer bandwidth. Stock images weren’t an option, and waiting in the design queue bogged down our publication schedule.
Our search for a solution led us to look internally at our own platform. And what initially started as an experimental approach quickly became a must-have workflow in our blog operations.
To demonstrate Creatopy’s many lateral applications beyond just ad automation, we’ll explore one of its lesser-known use cases—using Creatopy templates for blog asset creation—by walking you through how we implemented it into our asset design workflow.
Table of contents
- The problem: Increasing blog visual needs, limited designer bandwidth
- The solution: Designer-approved, editable templates in Creatopy
- How we established a hybrid design workflow with Creatopy
- The outcome: Cleared backlog and increased blog post production
In a rush? Explore Creatopy’s banner templates right away.
The problem: Increasing blog visual needs, limited designer bandwidth
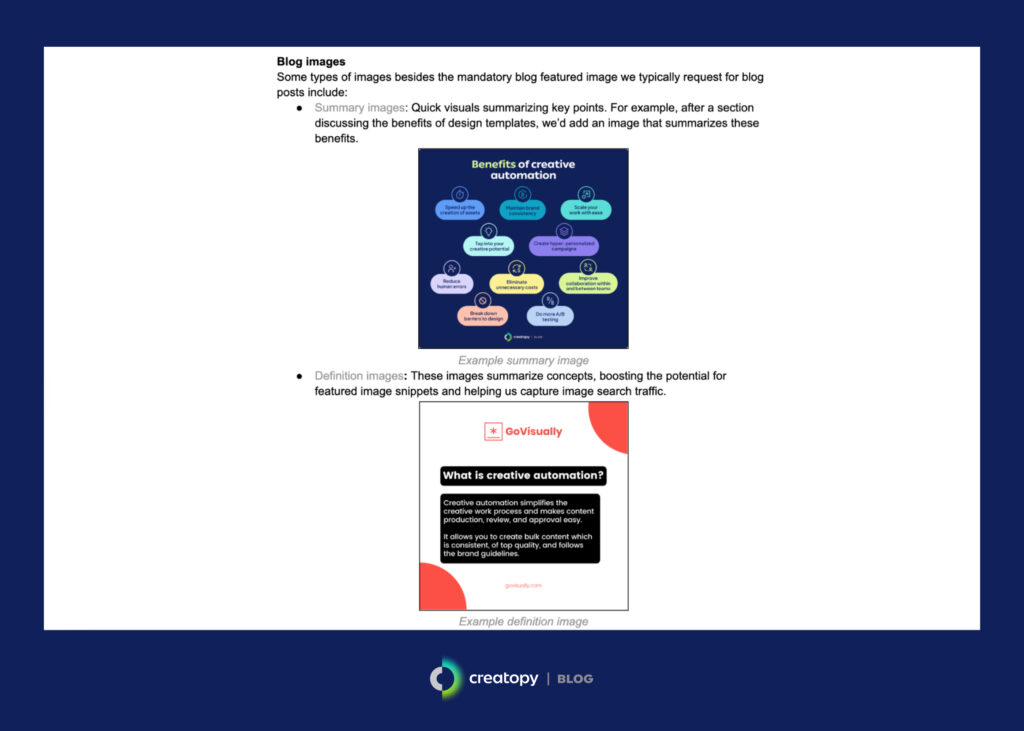
As our team of writers grew and content production ramped up, the need for on-brand visual content spiked as well. We needed more and more featured, inline, and SEO images to strengthen our content and its distribution across marketing channels.
But despite the pressing need for visuals, our designers were already stretched thin, juggling requests from multiple teams—such as sales and customer success—which often took precedence. And while the idea of using generic visuals and stock imagery did cross our minds, we quickly ruled this out due to the fear of brand dilution.
As our blog content scaled, so did the demand for design assets, placing a growing burden on our cross-functional team. Managing these repetitive tasks made it difficult to allocate resources to more complex projects while also ensuring consistency and brand alignment across all creatives.
— Laura Vlad, Creative Design Manager at Creatopy
As content marketers, we sat and pondered different ways to improve the design process: Should we limit the number of assets per blog post? Prioritize featured images while putting inline and SEO images in the backlog? Or be scrutinizingly selective with stock images, choosing only those that resemble our brand’s look and feel?
All the while, the obvious solution was right in front of us: automate part of the design process by creating and using templates in Creatopy.
The solution: Designer-approved, editable templates in Creatopy
The best way for us to scale our blog visuals was to lean on Creatopy’s template capabilities. Designers would first create custom, branded templates for different types of blog visuals. Writers could then make controlled edits, customizing templates to fit each blog post without compromising brand identity.
But how exactly does Creatopy enable this?
Driving collaboration with Creatopy’s Ad Studio and Light Editor
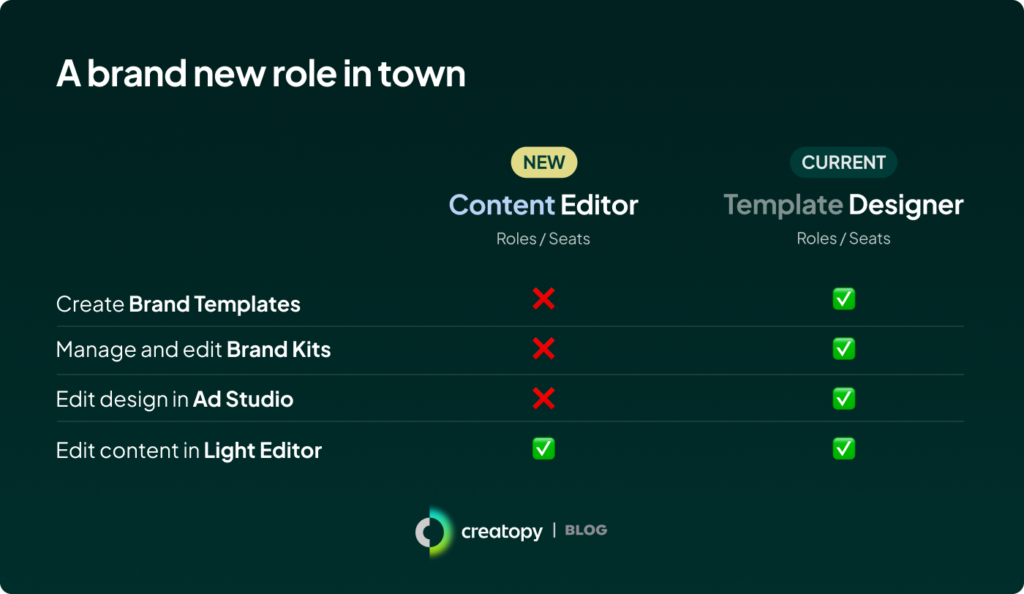
Creatopy’s platform serves two distinctly different audiences: designers and non-designers. This doesn’t just mean different roles and permissions but completely different in-platform design experiences for both. That is, Ad Studio for designers in “Designer” roles and Light Editor for non-designers in “Content Editor” roles.
- Creatopy’s Ad Studio is a design interface that gives designers all the professional design features they’d need to handcraft unique visuals and branded templates.
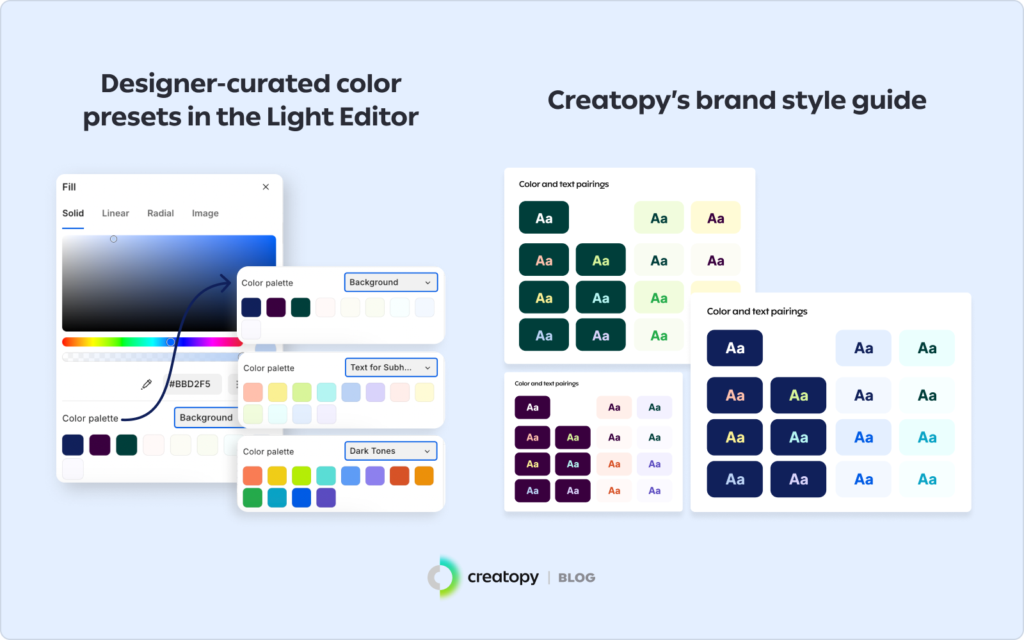
- Creatopy’s Light Editor is a simplified interface for non-designers that allows quick edits like text, image, and color swaps. Designers define the level of editing freedom for “Content Editor” roles through pre-set permissions.
Turns out, the tool we were looking for was…us! Instead of implementing a complex system, we used Creatopy to streamline the process. Designers have their dedicated workspace to create on-brand templates, while blog editors work with a simplified version, allowing them to generate and adapt visuals effortlessly—all while keeping brand consistency intact. This way, both teams could move forward while reducing the burden on our design team.
— Laura Vlad, Creative Design Manager at Creatopy
How we established a hybrid design workflow with Creatopy
Instead of relying entirely on designers for visual asset production, we built a collaborative workflow between writers and designers using Creatopy—no design masterclasses needed.
We did this using a four-step process:
- Writers and designers aligned on needs and capabilities
- Designers created editable, brand-approved templates
- Writers edited templates, adapting them to fit blog content
- Edited templates went through final reviews and refinements
1. Writers and designers aligned on needs and capabilities
For starters, writers hopped on a call with designers to discuss the visual needs of the blog and how designers can support their creation. They went back and forth on questions like:
- What are the most common types of blog visuals needed?
- Which assets can be templatized, and which require hands-on attention by designers?
- What level of customization do writers need for each template?
- What elements need to be locked in to maintain brand consistency?
- Which existing brand assets—such as icons or graphics—can writers use to populate templates?
- What’s the best way for writers to request new templates or modify existing ones?
- How can writers request feedback from designers?
- How do we manage ad hoc requests that go beyond the scope of templates?
As a supplement, writers compiled a document of commonly used blog visuals to guide designers.
2. Designers created editable, brand-approved templates
Once designers obtained the necessary information, they went into Creatopy’s Ad Studio to create the blog visual templates. For each template, they applied:
- Locked branded elements such as typography, colors, spacing, visual elements, icons, and logos.
- Designer know-how and best practices for design templates to maintain visual cohesion and give everything a polished, professional look.
- Customizable or swappable elements so writers could easily come in and make edits to each template.
I created templates with locked brand elements like fonts, colors, and logos to keep everything consistent. At the same time, I made sure writers could easily update text and swap images without breaking the design.
– Rebeca Gruie, Visual Designer at Creatopy
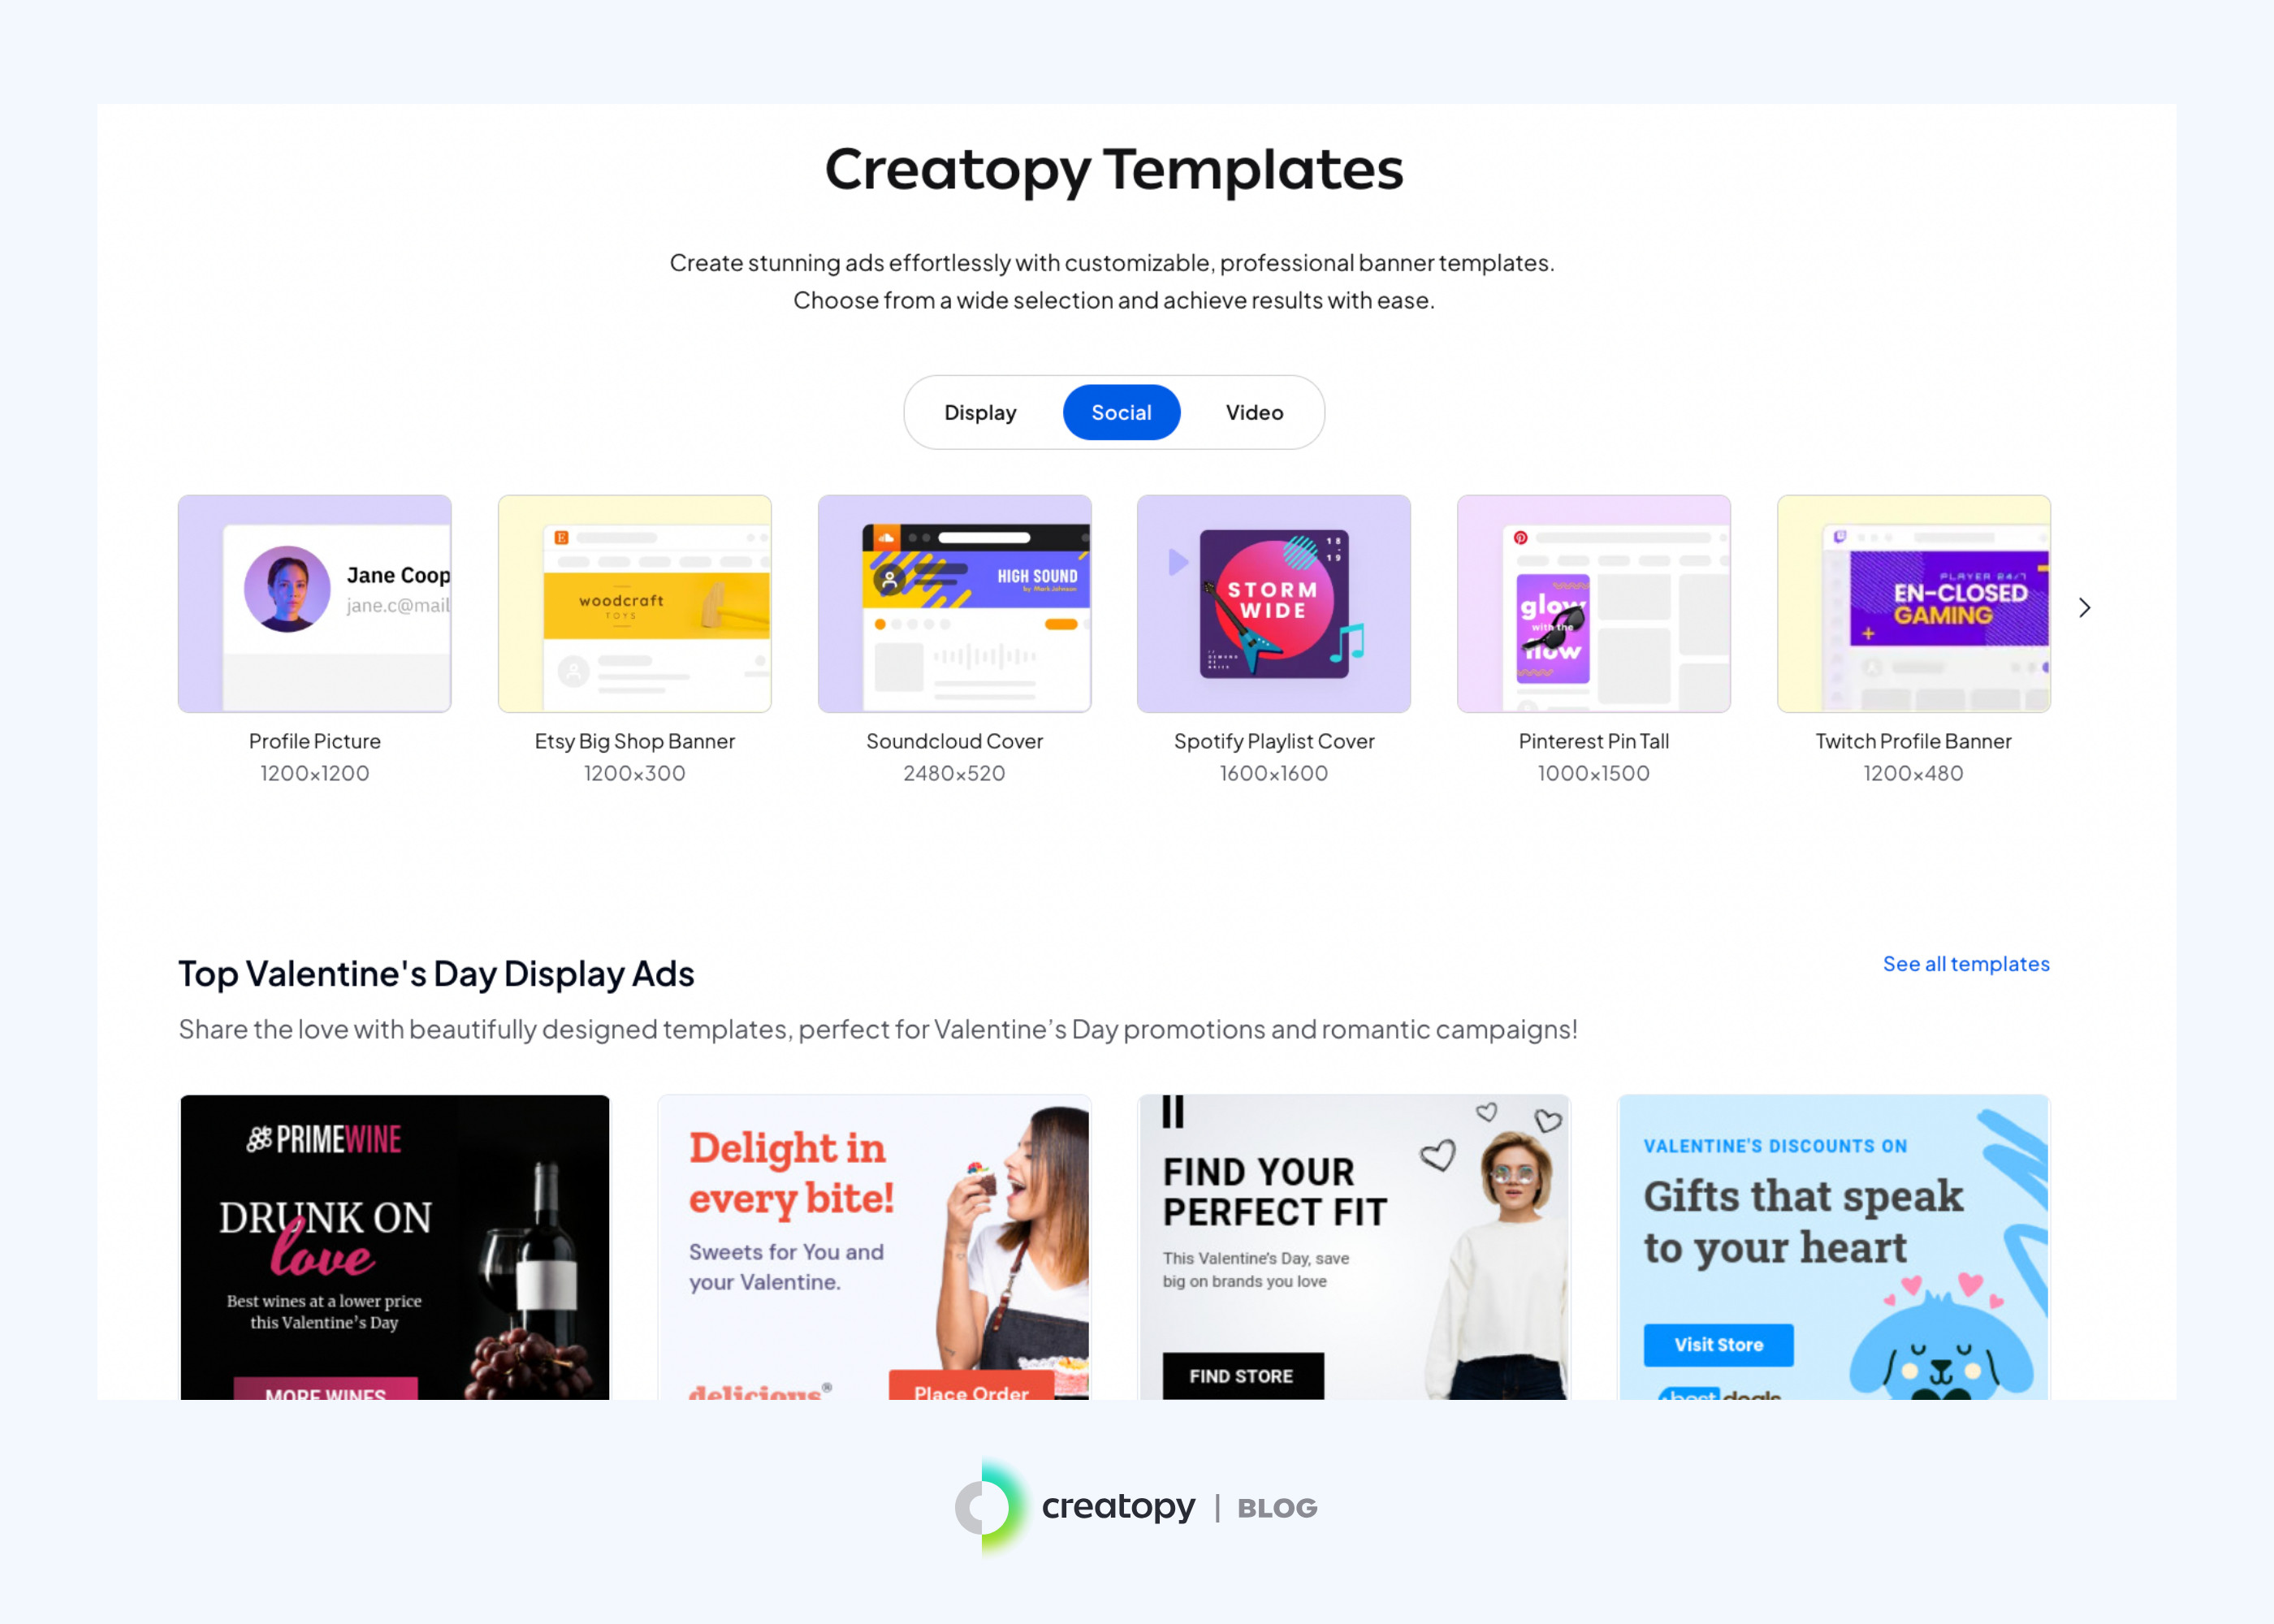
Example of a visual design template made in Creatopy
Let’s look at a quick, real-life example of a template designed in Creatopy’s Ad Studio by one of our designers.
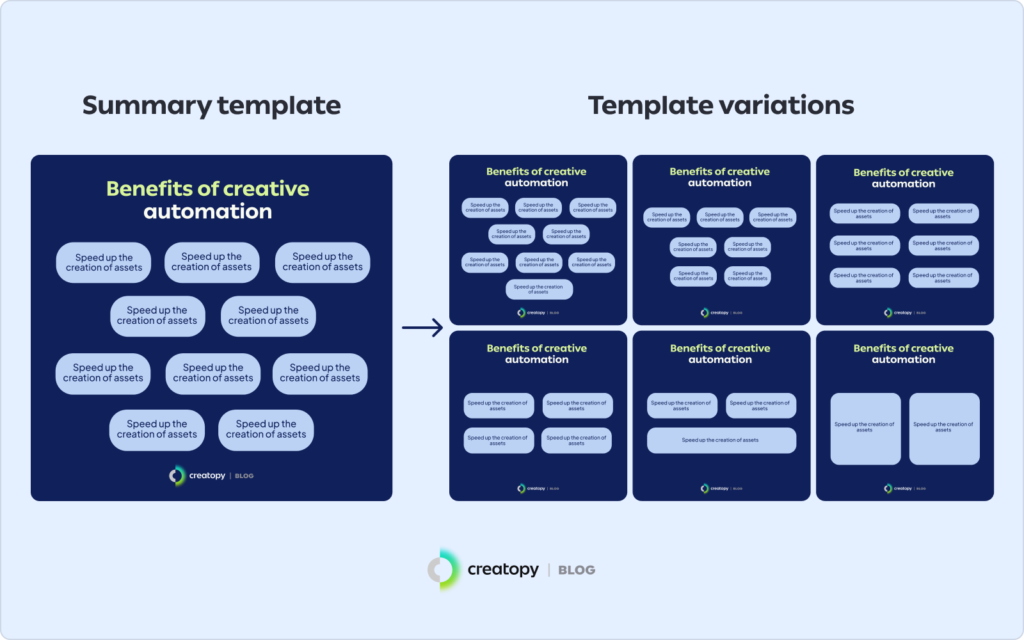
This specific template—a clustered key-point infographic or “summary template”—helps writers visually present information in a digestible format. Writers use it to highlight the benefits, challenges, or key insights of a blog post or section.
Since different articles or sections require varying numbers of items to be summarized, designers created multiple template variations, covering anywhere from two to 10 items. Writers can then choose the most suitable variation of this template and customize it to fit their content.
3. Writers edited templates, adapting them to fit blog content
After designers created the templates, writers had access to a vast library of ready-to-edit banner templates in Creatopy’s Light Editor.
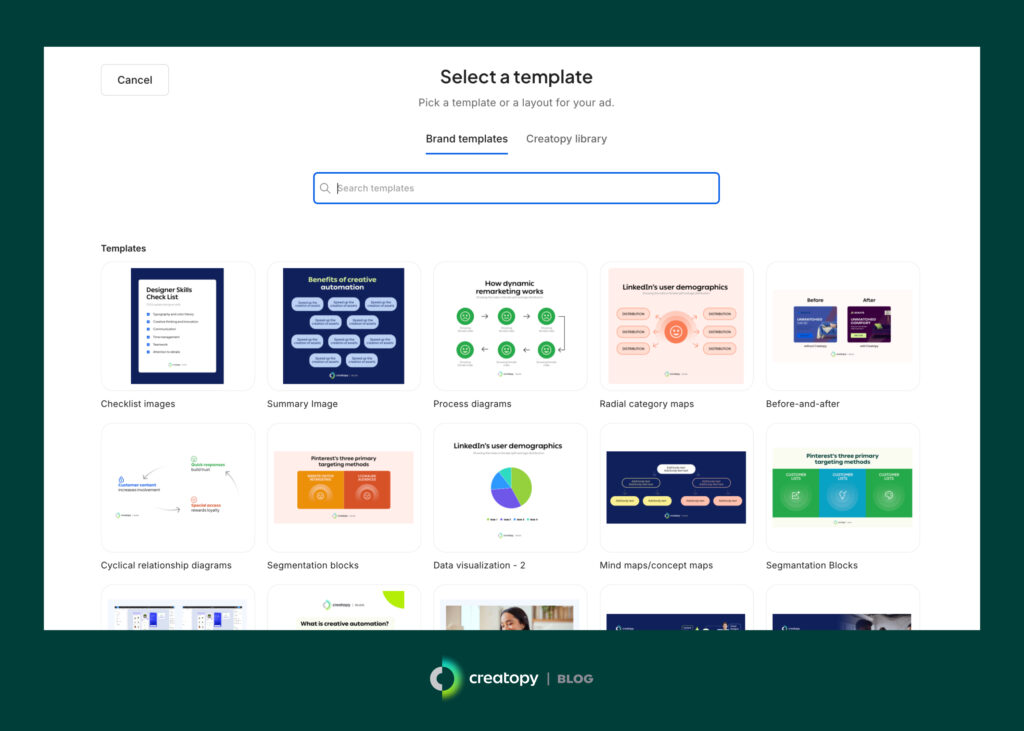
As mentioned, writers’ editing capabilities were limited to those permitted by designers. For blog visuals, this included recoloring select elements from preset colors, choosing from predefined logo choices, changing the copy, and adding or swapping images.
4. Edited templates went through final reviews and refinements
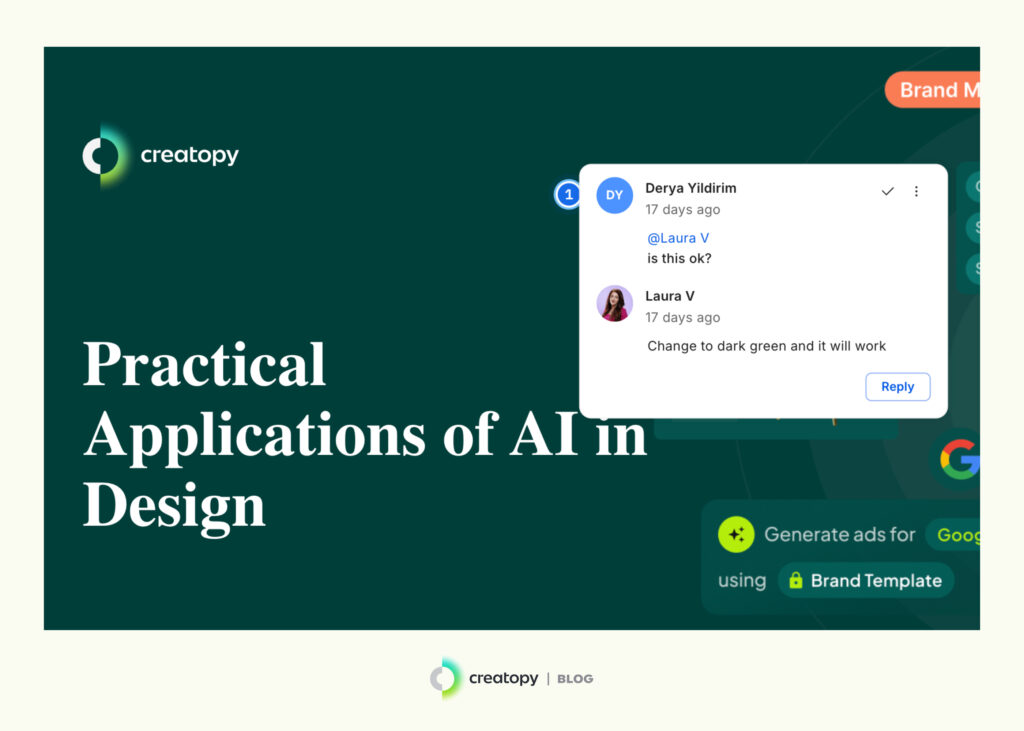
Once writers finished making edits to their chosen templates, they requested feedback from designers using Creatopy’s internal communication tools. They tagged designers and left comments asking whether changes were necessary.
Designers could then reply and leave their suggestions directly on the design, making collaboration on designs easy and centralized, with no scattered conversations across communication tools.
When I started using the Light Editor in Creatopy, I was amazed by how naturally it fit into my content creation workflow. I can confidently adjust text, swap images, and work with preset color schemes, and I love how the locked brand elements keep me from accidentally straying from our visual identity. And I can do all of this in just a few minutes, which completely transformed how I approach my content work.
— Loredana Popa, Senior Content Marketer at Creatopy
As a result, designers can oversee the entire process from start to finish, providing guidance whenever needed without having to be hands-on the whole time.
The outcome: Cleared backlog and increased blog article production
Using Creatopy for our blog’s visual assets saved us a lot of back-and-forths, not only reducing the burden on designers’ shoulders but also removing bottlenecks from the blog project. This gave rise to three key benefits:
- Faster blog turnaround times
- Effective cross-team collaboration
- Measurable efficiency gains
Faster blog turnaround times
Before using Creatopy templates, we had a growing number of unpublished articles in the backlog. As those awaited visuals, our publication schedule lagged, making it challenging to match competitors’ pace of content production or address industry changes with our content in due time.
Creatopy’s templates helped us eliminate this issue as writers could chime in to quickly produce on-brand, quality visuals without needing their hands held by designers at every step.
Effective cross-team collaboration
Creatopy’s built-in feedback tools improved communication between writers and designers by bringing all design-related conversations to one place. Our designers can now respond to feedback requests and make alterations in real-time directly on the designs themselves, reducing misunderstandings or miscommunications.
Measurable efficiency gains
Before Creatopy’s template implementation, our team could only publish one to two blog posts per week, as each article required a featured image and multiple inline images, all of which had to be manually created by designers.
The impact of Creatopy’s templates was not only immediate but striking. In the first week alone, one writer increased their publishing capacity by over 250%, clearing their backlog of three unpublished articles in just three days by independently creating 12 new images. Without Creatopy, this task would’ve taken weeks given our old workflow.
Want to give Creatopy a go?
With Creatopy’s template capabilities, writers in our marketing team can now produce high-quality, on-brand visuals. Not only does this speed up the production rate, but it also frees designers from having to manually create each design.
Therefore, templates—and their ease of use for non-designers in the Light Editor—have become an integral part of our content production process, allowing us to eradicate the bottlenecks that once plagued our publication process.
If your team faces similar design hurdles, Creatopy may just be the solution you’re looking for. It’s not limited to helping you create ads at scale—it’s a viable solution for all sorts of design needs, allowing you to scale your output without needing a proportional increase in designer headcount. Curious? Get started with a free Creatopy trial today.