What is it about a photo with text on it that grabs our attention, and why do all the billboards in town stick out to us so much?
By adding text to a photo, you can change an image’s story completely and shine a little more light on the message you’re trying to portray.
The combination of a great photo and eye-catching text will grab the attention of any by-passer. All you have to do is combine the two perfectly.

Source: InspirationDE, The Culture Trip, Iq Agency, Inspiration DE
Why add text to photos?
Maybe you’re a lifestyle blogger and want to further explain the story of your photo, or maybe you’re a business owner and you want to promote your brand new restaurant.
Maybe you just took a hilarious photo and are on your way to creating the newest viral meme. The reasons to add text to photos are vast and endless.
So no matter what you do or what your reasoning, there will come a point in time when you will need to add text to a photo and you need to know how to do that efficiently and what app to use for such a task as this.
Different techniques for adding text to photos
Of course, there are many different techniques when it comes to adding text to your images. Just like art, there’s not “one” specific way of doing things. It’s a way you can express yourself better and there’s not just one way to do that.
And because there isn’t just one right way to add texts to photos, I’m going to go over quite a few techniques to add text to photos.
If you are looking for more information on how to add text to images, then follow along! You’re in the right place.
Now as I said above in this article, you need to decide what kind of tone or message you’re wanting to portray.
Are you trying to show off wedding services? Maybe try a more romantic and elegant font.
Maybe something that looks hand-written and that is written in cursive, like this.
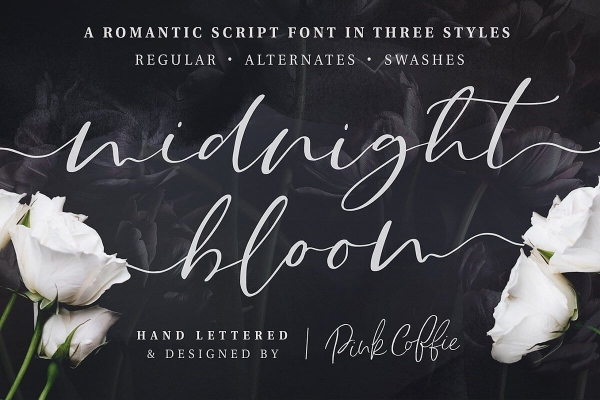
Source: Creative Market
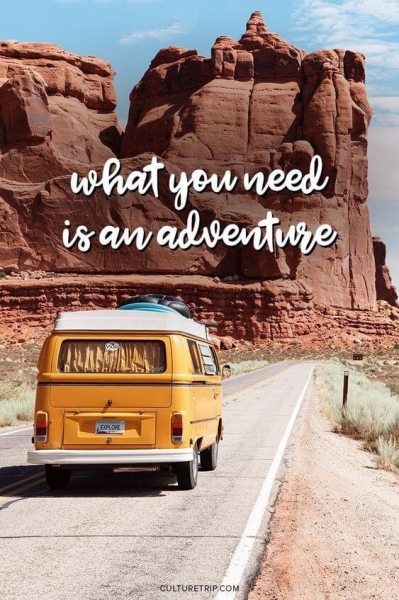
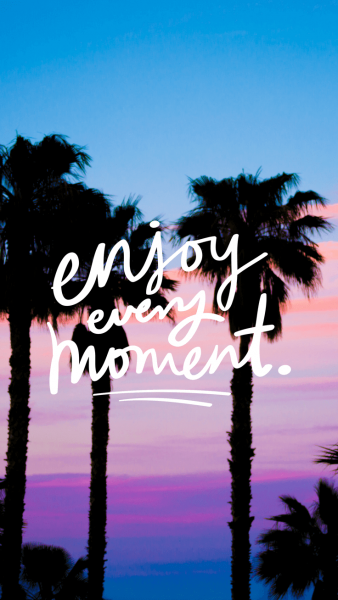
Maybe you want to show people how important it is to follow their dreams and go traveling.
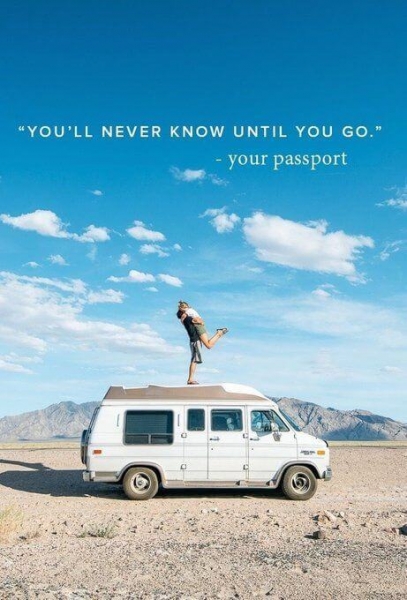
Source: Twitter
Each font will give your photo an individual vibe. So you need to make sure that you have a font that is really going to compliment your photo when you add text to the photo and that it perfectly describes what you’re trying to show and say.
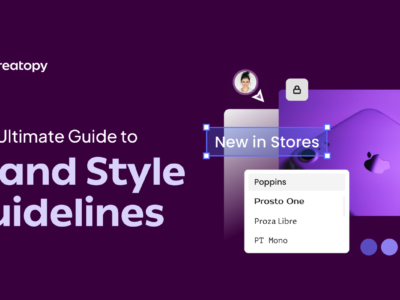
Add Text to Photos with Creatopy
- Create an account
- Pick a size
- Choose an Image or Upload Your Own Photo
- Choose a Font
- Add Text to Your Photo – Negative Space
- Download Your Work
To learn how to add text to photos, follow the tutorial directly below.
For more tips and tricks on how to add text to photos and how to make it look amazing, scroll down towards the bottom.
1. Create an account
The first and best thing you could do is to create a free Creatopy account.
Creating an account is as easy as 1-2-3. And it’s absolutely free.
We have tons of amazing things to enhance your photos and ads.
2. Pick a size
Once you’re on the platform’s dashboard, click on the search tab from the left side of the screen, and you’ll see a list of sizes.
Or, you can also scroll through the available categories on the dashboard.
Pick a size you like and seem fit for your future design.
3. Choose an image
Now it’s time to get the creativity flowing.
In the Editor section, click on the Elements tab from the left side of the screen. Then, go to Stock Photos and search from our 2 million+ stock photos for the one you like the most.
Or, you can always upload your own photo.
Go to the My Uploads tab from the screen’s left side and bring photos from your computer into the platform.
But, you can simplify this entire process and simply drag & drop your photo into the workspace.
4. Choose a font
Once your image is ready for some spectacular lettering, it’s time to pick out the tone of your message. What is your message? Why are you putting text on this photo?
By answering these questions, you can start to narrow down the type of font you should use.
Click on the Text tab from the left bar, and pick a heading, subheading, or body text.
Then, press on the T from the bar that appeared on your workspace and search through all the cool font presets that Creatopy has to offer.
Choose the one that matches your tone best.
You’ll see that you can also edit your font: change its color, look, size, and more.
Creatopy also gives you the option to upload your own fonts if that’s something you’re interested in.
Go to the dashboard and search for the Brand kits tab from the left side of the screen.
Press on Create new Brand kit and upload your logos, create color palettes, and pick or upload a font. Name your brand kit, and you’re done.
Once you’ve done this, you’ll find it in the Editor while you’re working on your design. Look for the Brand kit tab on the left side of the screen.
Just having a great font on your picture isn’t enough. The placement and color of your font make the true magic happen. Let’s talk about that.
5. Where to add text on your photo | Negative space
Most designers would recommend that you place your font where it’s most visually pleasing and visible.
That place, most times, is in the negative space. “Negative space”, as described by Creativebloq, “is quite simply the space that surrounds an object in an image”.
Inspect your image, and look for that negative space. By placing your font there, you’ll look sleek and professional.
Your reader’s eyes will be drawn to the text automatically because of its perfect placement.
When adding text to your photo, you need to be short, sweet, and to the point with what you’re trying to tell your reader. Don’t overload the photo with text.
Just put out your main idea, and maybe a few extra details. Don’t overload your readers with text. They’ll simply ignore your image and keep scrolling right on down.
6. Download your work
Now that your work is done and you’ve put text on your image, it’s time to download your art. The process is simple.
Click the Download icon and choose one of the available formats.

Now go on all your social media accounts and start posting your awesome work for everyone to see.
5 different ways you can add text to your photos:
1. Adding more than one font to an image
Of course, to really wow your readers, you should find fonts that go amazingly together and really complement each other when you add them to your photos.

Source: Make time to see the world
Luckily for you, you don’t have to guess which texts go well together. You don’t need to overthink your choices and wonder if your texts and fonts are going to go well together.
Our professional designers here at Creatopy have already lifted that weight off your shoulders and put in some hard work to pair the best fonts together as presets.
When you go on Creatopy, not only will you get to add text to photos for free, you’ll get tons of font presets that will look fantastic on your photos.
Go sign up for free now and get access to everything you need to create the most beautiful banners and photos ever!
2. 3D fonts
3d fonts are definitely eye-catching because they literally stand out at you.
An easy hack that I practice to get 3d-looking fonts is by duplicating my original font, changing the duplicated font to a different color, and then placing the duplicated font on top of the original one.
Once I place it on top of it, I move the duplicated font a little higher or lower, and to the left or right just a notch, to get this beautiful 3d effect.
3. Handwritten text
Another great technique for you to try is the hand-written text. Hand-written text gives an uncanny effect of humanness. When someone sees handwritten text, they automatically feel comfortable and they’ll trust you.
If you run an elegant business, restaurant, or have any photography or wedding services, this technique would be amazing for you!
For this image, I just added Playlist Script to the top, wrote out my services and chose a color that would stand out on a dark background.
At the bottom of the photo, however, I used a sleek, modern font called Poppins. The contrast between the two fonts is complementary to each other, and they go perfectly together.
There are plenty of handwritten fonts to choose from. We have an article written just for you about what style of hand lettering fonts look best on different kinds of photos.
If you like this look, the font preset is waiting for you in Creatopy!

4. Blurred background
Another great technique for is blurring the background. This is great for getting your message across swiftly and clearly. You should use a strong message for this technique.
Not only does Creatopy have tons of great fonts to add to your pictures, but it also has an entire photo editing system in it!
Creatopy is a one-stop-shop. You can edit your photos from A-Z here. Let me show you what I mean.
Open your Creatopy workspace, upload/select your image, then select the color palette. When you select that color palette, you’ll see tons of filters and editing options.
For this technique, I’m going to select the blur scale and move it up to about 2. I’ll enhance the brightness on this photo as well.
For this photo, I wanted to portray a strong message. I also chose a corresponding font to my message. Something about a typewriter font really sparks that need to travel.
I blurred the background so that the text stands out at you, but you don’t lose the essence of the image either, because the blur is not too strong, and you still get the message.
5. Animated text
I saved the best technique for last here. You can add animated text to photos?
Let me answer that for you: Why yes! You absolutely can!
This will really spice things up. It’s not just any old picture with some text on it.
No, no, no! This right here will really catch the eyes of your reader and they will be absolutely mesmerized.
Let me show you how you can add animated text to photos in Creatopy.
Firstly, click on create new, and select Banner set.
Now select your size and click on next.
Now select animated at the top, and start from blank. Or if you want to, you can start from any of these templates and edit them to your liking.
Now that you’ve entered the Creatopy Banner Generator editor, it’s time to add your photo and text.
Now, I’ve selected the text, and I’ve clicked on the “video” icon. This will open lots of transition options. Select the drop-down menu, and choose a transition to add to your text to make it animated!
Now I’m going to save and download this as an animated gif, and voila!
It was really that simple to create such an elegant and intricate design.
Now you have beautifully animated text added to your photo which is definitely show-stopping and eye-catching.

Great examples of text added to images
For a little bit of inspiration for your artwork, I thought I’d show you a couple of my favorite examples I found online of what it looks like to add text to images.
There are a lot of different ways to add text to pictures, so I’m going to show you a few of the many different ways to do this. Adding text will give your photos that special and unique flair you were looking for. Take these images for example:
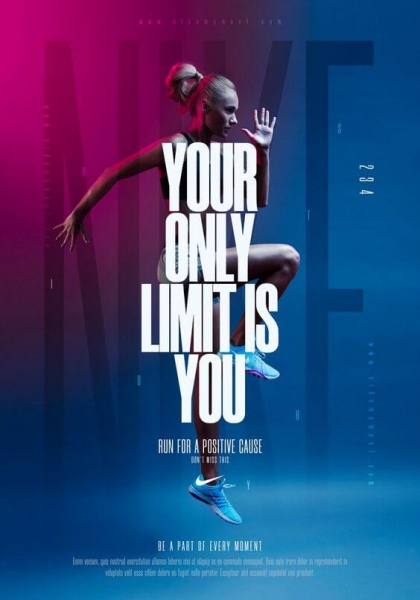
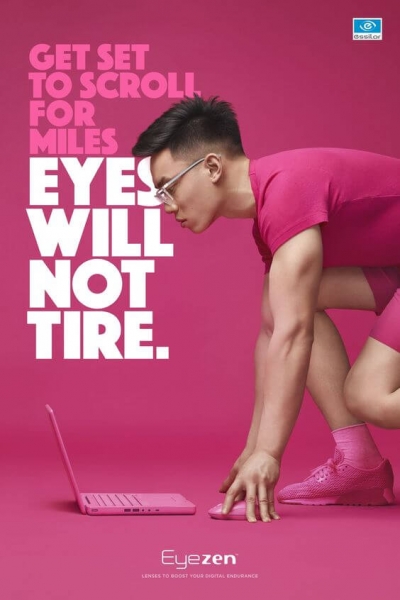
This Nike Basketball image is simply mesmerizing.
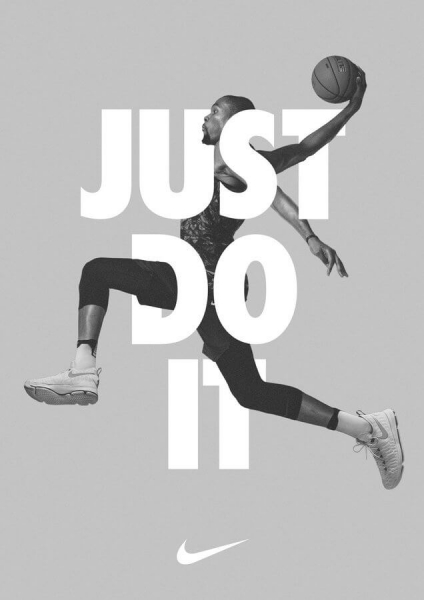
Source: Nike Basketball
Then, we have this delicious restaurant ad, that you can almost taste just by looking at it.
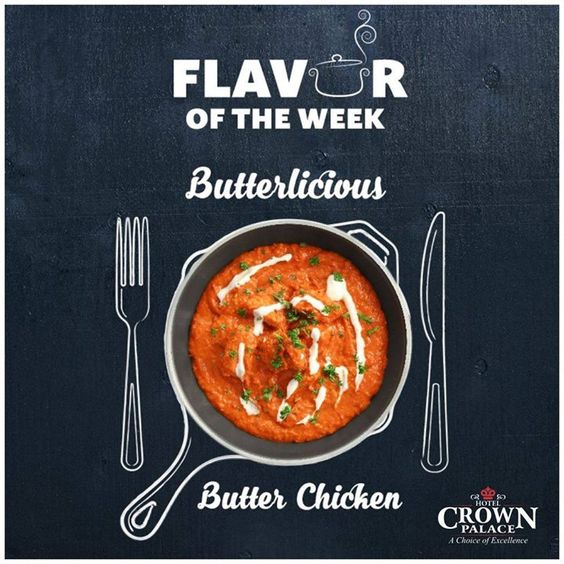
Source: Hotel Crown Palace
And the last of my examples, for now, is an inspirational quote; because we all need a little encouragement sometimes.
Source: Preppy Wallpapers
No matter what style of text you want to add to your photo or the reason why you want to add text to your image, I’m sure you can get a little inspiration from this article.
Source: IqAgency

Source: Abduzeedo
Source: Mocca
Source: Behance
Source: InspirationDE
Source: Behance
Source: L’ADN

Source: Her Coffee Break

Source: IqAgency
Before and afters of text on photos
I just wanted to show you the major difference that text makes when added to photos. Here are just a few before and afters of images before having text, and images after adding text

Each of these photos brings a totally different message to the table after some text was added. You can change the entire story of a photo by adding text to images.
Go to Creatopy now to make your image tell a beautiful and unique story to all your readers!
Conclusion
Adding text to photos is such a breeze when you use Creatopy Think of it as your own, personal photo-text editor.
Now that you’re basically pro and if you follow all my tips and tricks, you’ll have the best photos on the internet in no time!
So what are you waiting for? Go sign up for your free Creatopy account and let your creative side loose!