Learn how to make effective banners that grab attention and spread your message in 5 easy steps. This guide covers everything from choosing the right size to adding impactful visuals. By following these easy steps, you’ll not only create a single stunning design but an entire campaign that’s ready to be published and will help spread the word about your brand in no time.
Table of contents
- Choose a size
- Pick a template
- Personalize Your Banner
- Generate Multiple Sizes/Resize
- Export Your Banners
- Most Common Banner Sizes
- Conclusion
1. Choose a Size
When designing in Creatopy’s banner creator, you can get the dimensions right with no effort, thanks to the predefined sizes library which encompasses both display and social media ad sizes.
There may be numerous banner types out there, but you don’t have to know all the dimensions by heart if you want to learn how to design a banner. Quite the opposite, the less you concern yourself with technical aspects, the more you can focus on what really matters in ad-making—being creative.
Search for the size you need directly from Creatopy’s dashboard by clicking on the Start creating search bar or on the create button from the top right corner.
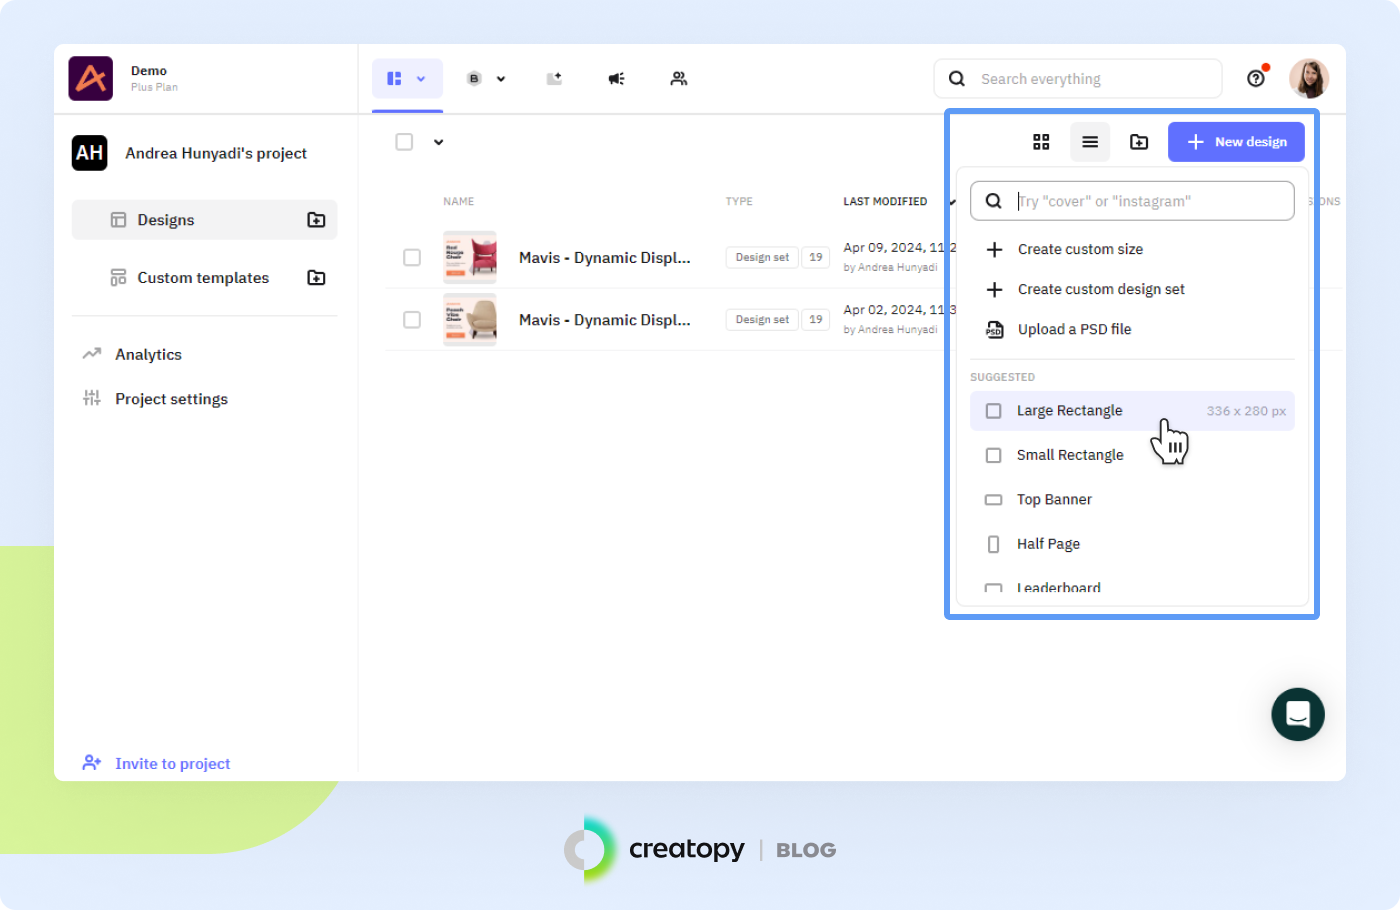
You’ll see a drop-down menu that allows you to quickly navigate all available preset sizes, including popular banner types such as large rectangles, leaderboards, Facebook covers, and others.
Scroll down to select the size you want to use for your design. Alternatively, you can type either the dimensions you need (e.g. 200×200 px) or the size name (e.g. small square) in the search bar.
Once you’re on the dedicated size page, click on Blank design and start laying your vision on canvas.
If you need specific dimensions that are not on this list, you can create a custom size (the first option on the drop-down menu) or start designing from an entire preset size set.
We know inspiration comes and goes, so you may not always be up to the task of designing from a blank canvas, and that’s okay. The next step is meant to help you in these moments.
2. Pick a Template
When you lack creative ideas on how to create a banner you’re short on time and need to have the design ready to publish asap, you can turn to premade templates for a headstart.
Creatopy has a wide range of static and animated templates you can use, regardless of the industry you are in, or the platforms you are publishing on.
After you select a predefined size, you’ll reach the dedicated page for that size. Next to the blank design area, you’ll see many professional-looking templates created by our in-house designers.
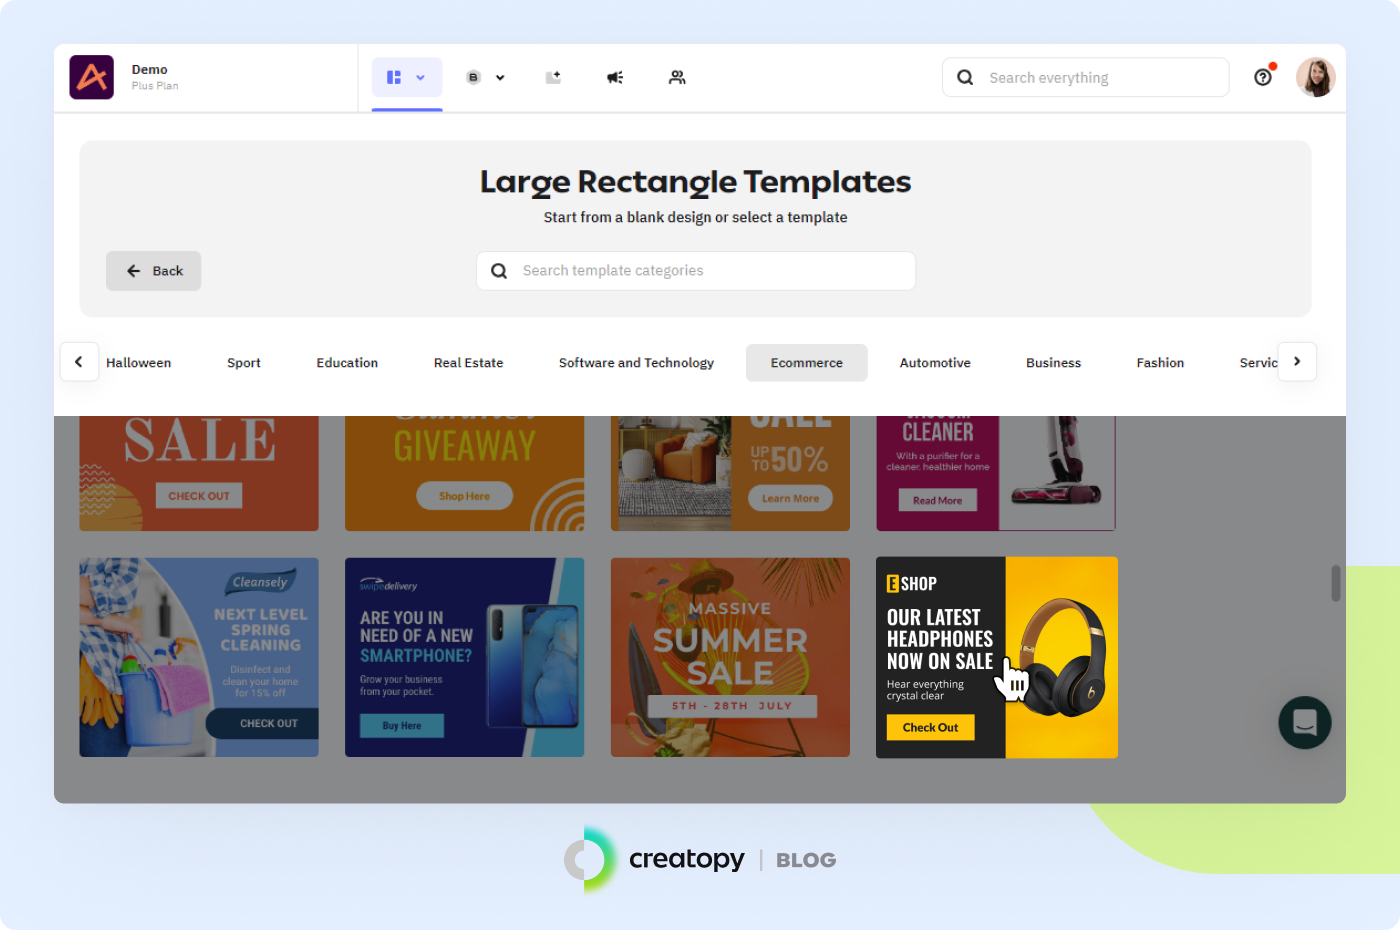
The horizontal navigation bar above the templates can help you find the right fit faster, as it features different template categories, including industry-specific and holiday and event-related ones.
For instance, if you want to make a banner for the ecommerce industry, go straight to that category and take your pick of the selection without having to browse through templates for other industries.
Likewise, if your design is supposed to be Easter-themed, head to the Easter category right away to find your inspiration.
Pro tip: Go for an animated template instead of a static one if you want to increase your banner’s chances of generating engagement.
3. Personalize Your Banner
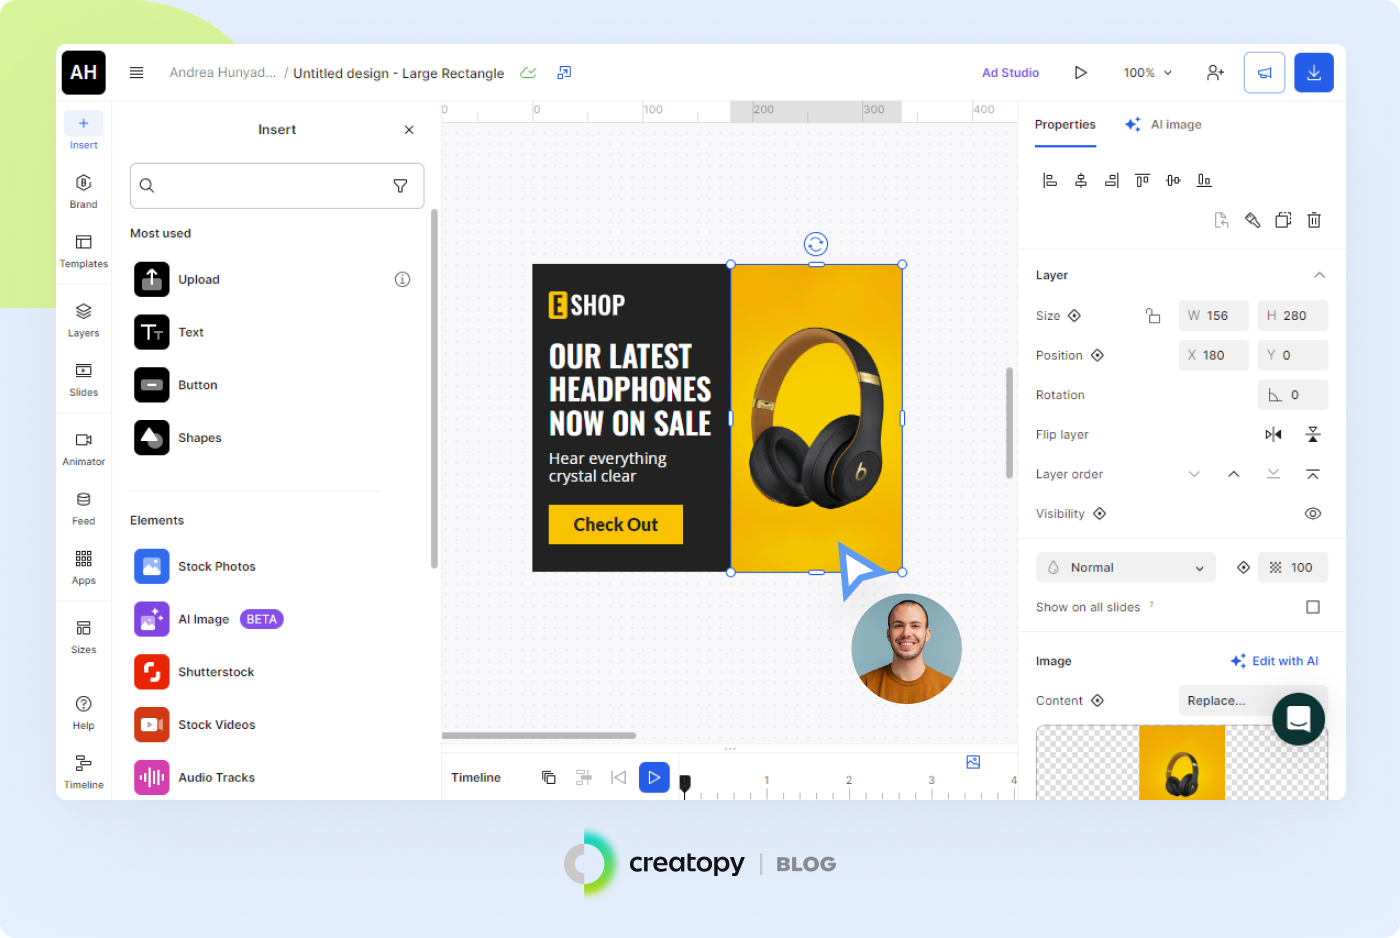
Now that you’ve selected your desired size or template, you should be in what we call the stage area, aka where your creativity can run loose.
On the left side of the banner maker, there is a menu with many tools you can use to customize your design.
You can add imagery and illustrations, use on-brand colors or fonts, and animate your banner using simple drag and drop motions.
To speed up the design process even more, use the keyboard shortcuts at the bottom of the sidebar menu to find your way around the banner maker with little help from your mouse or touchpad.
But let’s take an in-depth look at each way you can customize your design, one by one.
3.1. Add images to your banner
Eye-catching images are the most powerful ally in capturing viewers’ attention.
Access the elements option from the left-side menu to open a library with over 20 million Shutterstock images, original illustrations, and other creative elements like shapes, masks, icons, and logos.
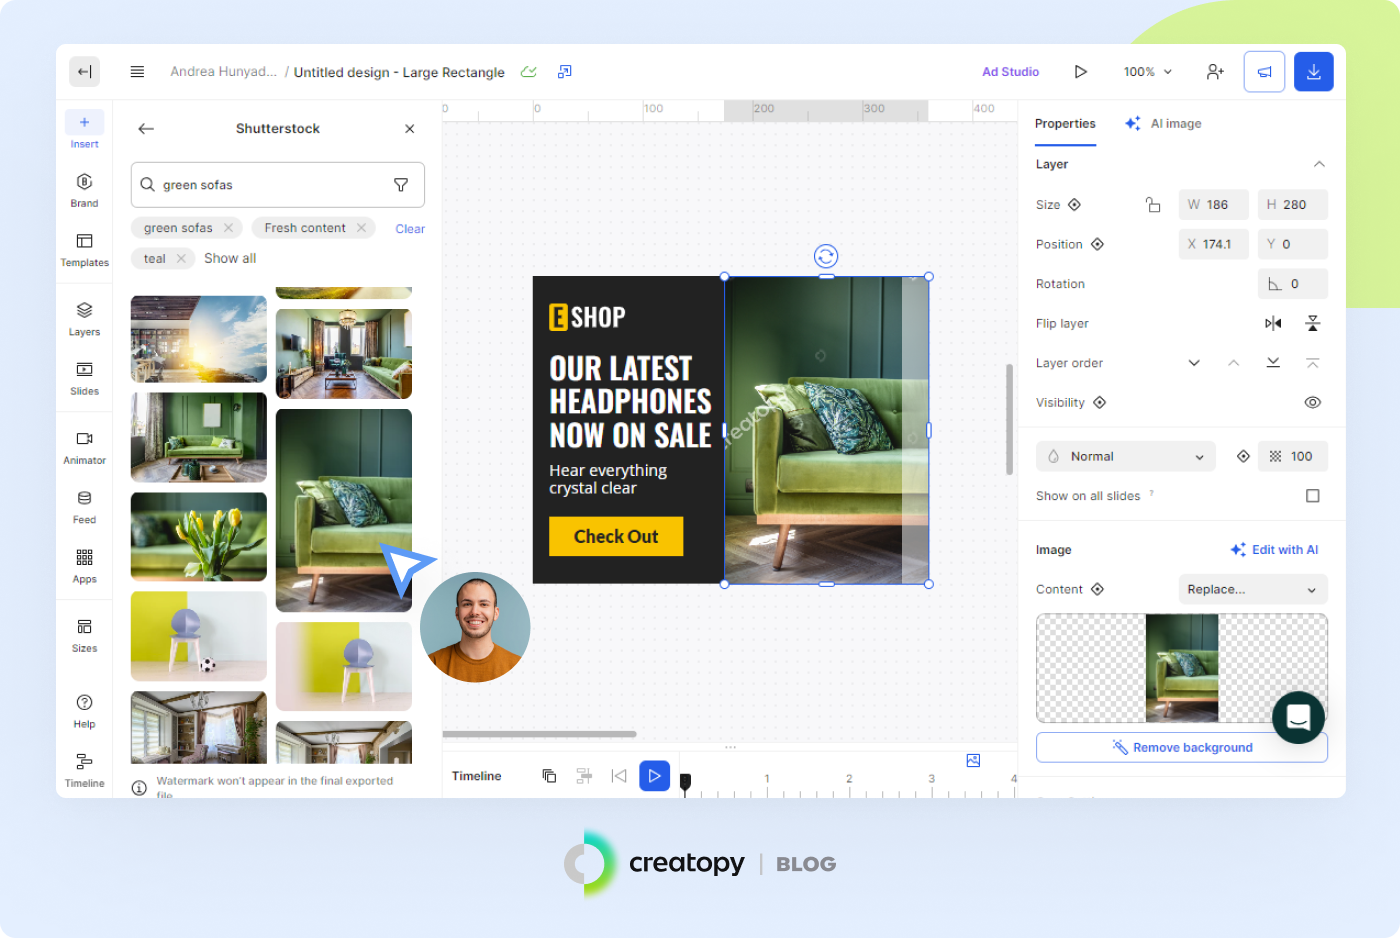
All of these are high-quality photos that will look great regardless of your banner’s dimensions.
However, if you prefer to design with your own images or illustrations, upload them to the platform in the My uploads section from the menu. From there you can simply drag them onto your design and position them however you like.
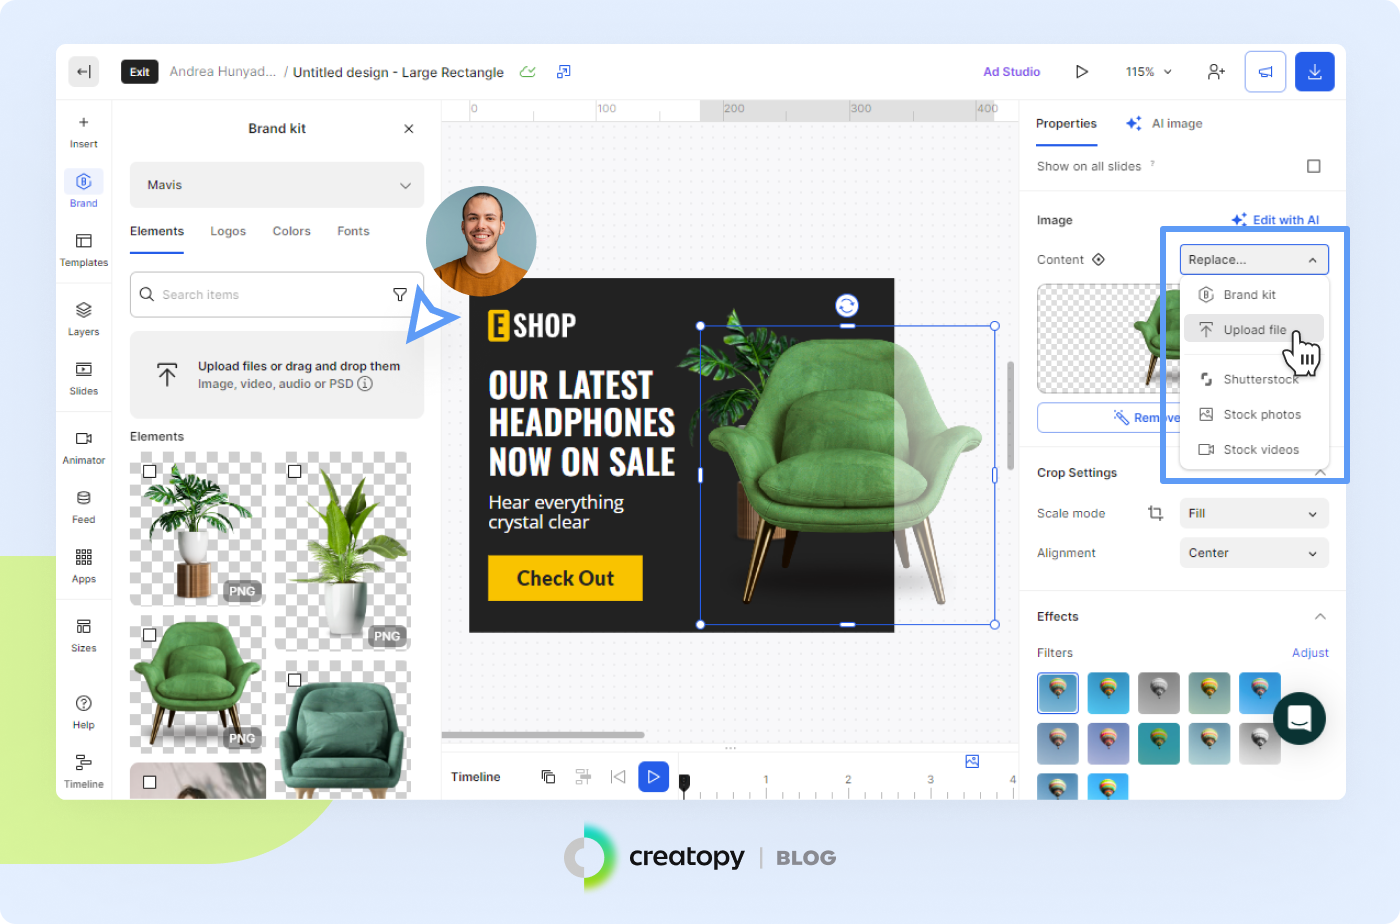
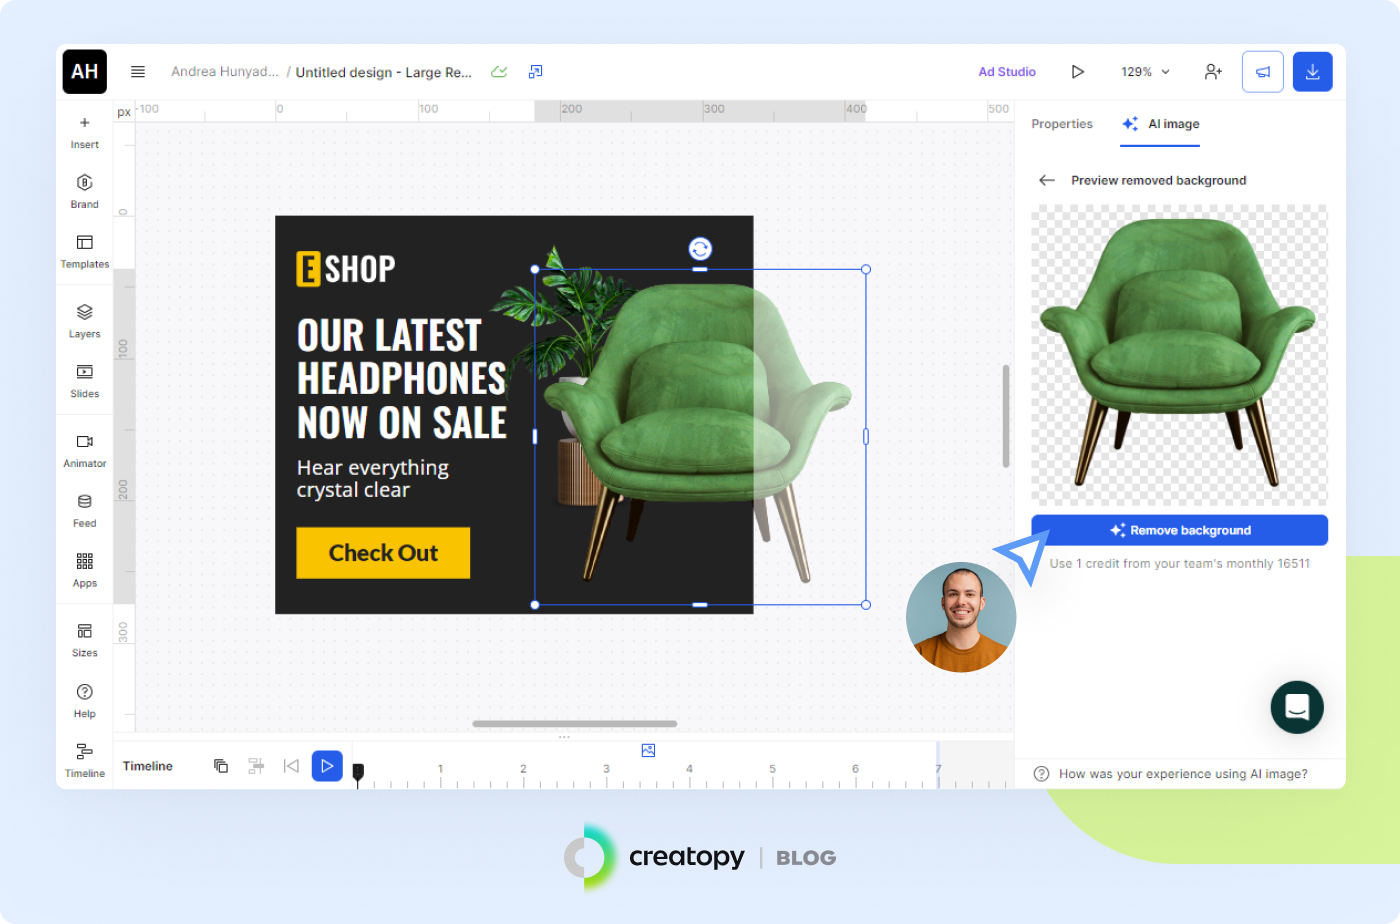
Do you want either a stock image or your uploaded one to be the focus of your ad? Use the background remover feature to automatically create clear background cutouts from any image and incorporate them into your design.
Another thing you can do to create balanced banner design layouts is crop the photos you use. This allows you to reposition the image and align all elements according to design principles like the golden ratio, thus creating visually appealing compositions.
On top of that, it helps you remove distracting or irrelevant elements from the photo, directing the eye to the main subject or focal point.
You can even combine image cropping with background removal. Use the former to cut away parts of the image, adjusting the framing for a close-up, and the latter to create a clear cutout and seamlessly integrate the subject with the new background.
3.2. Use appealing text and fonts
It’s time to think about the message you want to convey and how you want it to look, i.e., text and font.
Choosing aesthetically pleasing fonts to make your text look good is not enough. You also need to consider readability, affinity with your brand’s style, as well as matching between multiple fonts.
We recommend you refrain from using more than two fonts, as your want the text to be easily scannable. Luckily, Creatopy provides numerous complementary font pairings to use as they are or customize to fit your design.
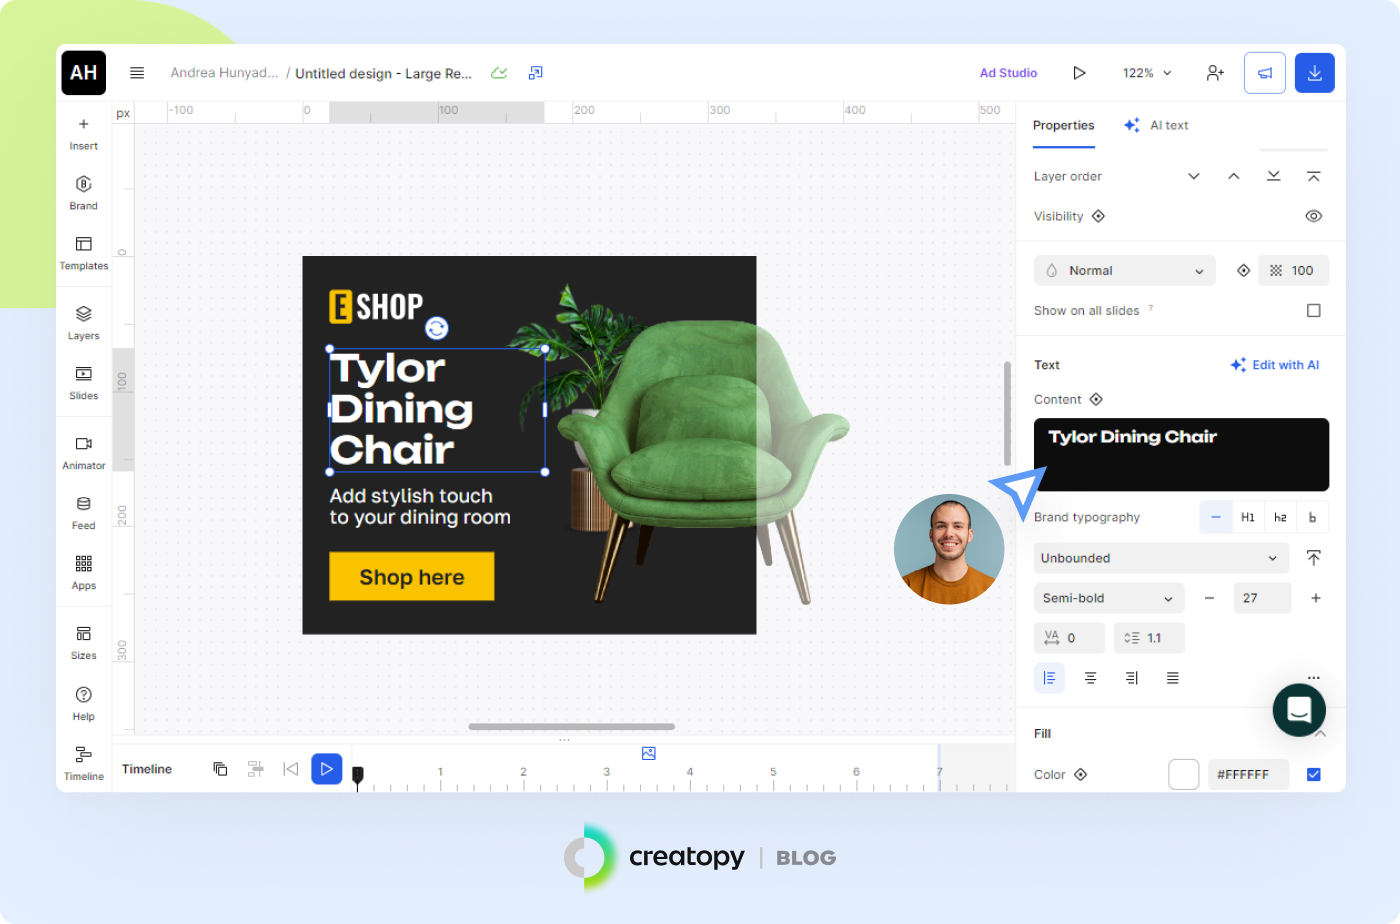
Open the Text option from the left menu to discover the typography presets and pick the one you find suitable. Change font, size, formatting, or adjust line height and align your text center, left, or right to achieve the best look.
Since we’re on the topic of text, let’s quickly discuss how you can add a CTA button to your banner.
In the button section of the menu, you will find numerous CTA button designs that you can personalize by modifying text and colors from the editor to inspire viewers to click.

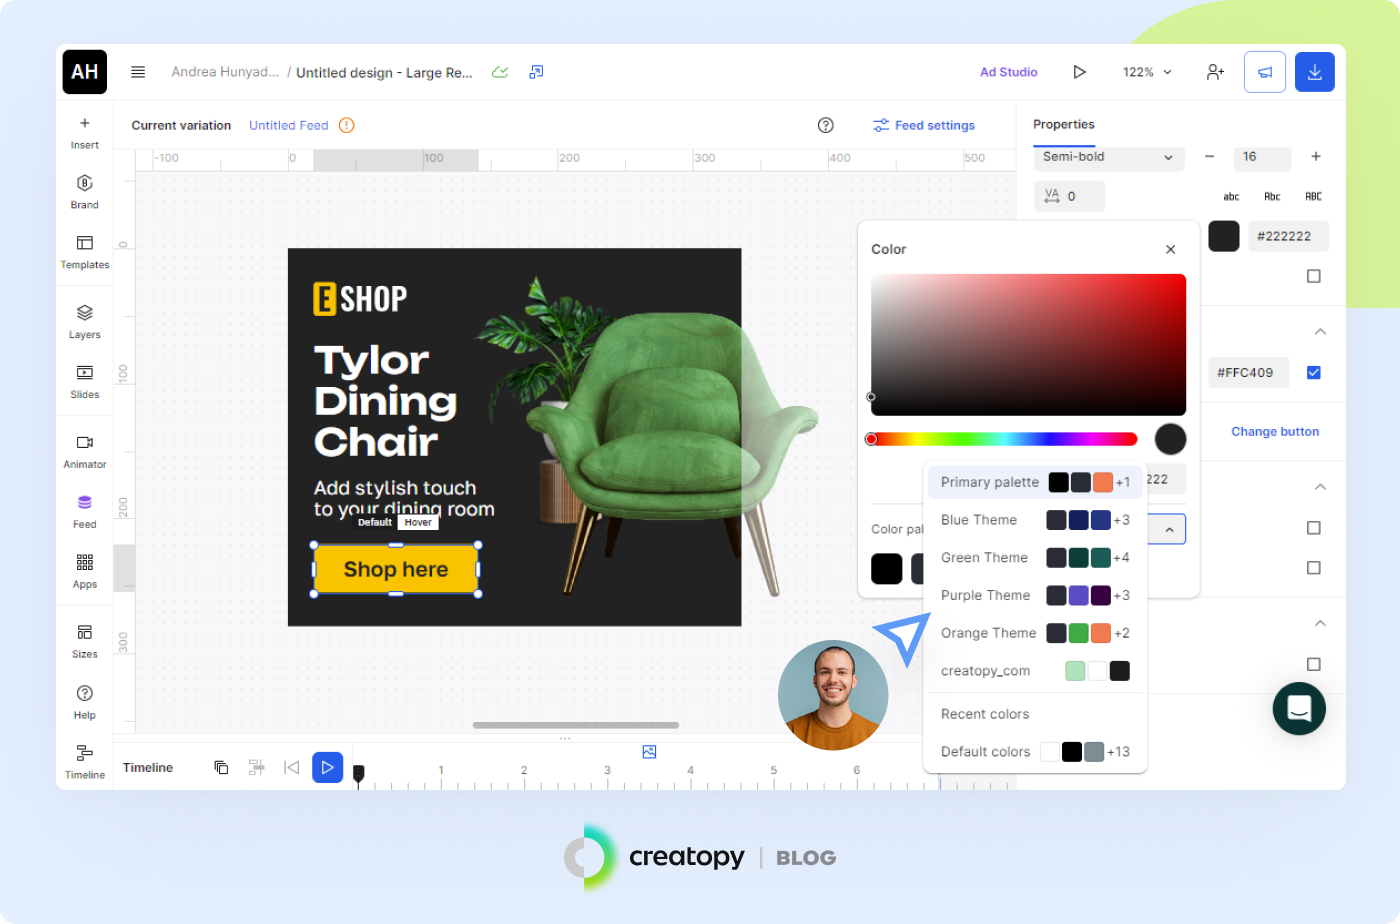
3.3. Try different color combinations
If you’re familiar with color theory, then you probably know colors can provoke certain feelings or thoughts in the viewer. You should keep this in mind when picking a color scheme, as it can serve your advertising purpose.
Go for complementary colors that create beautiful contrasts, such as orange and blue or yellow and purple, to ensure your banner manages to grab attention.
In Creatopy, you can change the color of design elements like illustrations, shapes, lines, or text regardless of whether you started with a predefined size or a template. Simply click on the element you wish to edit and adjust the color settings to your liking.
If you want a solid color background, it can easily be done by going to Background in the left side menu and selecting the color you want. Go for a gradient instead to get that one color that fades into another effect.
3.4. Incorporate branded elements
Incorporate your brand’s style into the banner to make it instantly recognizable to your target audience.
You can easily do this thanks to the Brand Kit feature in Creatopy, which allows you to bring brand assets like color palettes, logos, vectors, and typography into the app. Quickly open the kit from the left bar menu in the workspace whenever you design.
When using the Brand Kit feature, make sure to try out the color shuffle option, which adds your custom color palette to your in-progress banner in different variations so you don’t have to do it manually.
3.5. Add transitions/animations
Animated banners are known to inspire more engagement, and you’ll be happy to know you can add smooth transitions to yours with a couple of clicks, thanks to our Magic Animator feature.
Simply click on the Animator option from the left side menu and choose one of multiple animation presets that help you add motion to your ads within seconds.
You can adjust the delay and duration of the transitions from the animator preview, but if you want to take customization further and tailor the animation to your specific needs, open up the Timeline feature and play with various effects and different layer placements.
4. Generate Multiple Sizes/Resize
We’ve reached the part that makes the banner-making experience in Creatopy truly worth it.
Once you’re satisfied with how your design turned out, you can generate multiple size variations and have an entire campaign ready within minutes, using Creatopy’s resize tool.
Go to the left side menu and select the Resize option. Choose the desired predefined sizes for your banners or create custom ones and click on Generate a set in selected sizes.
There you have it—a simple shortcut around repetitive work. There’s only one step left and you can publish your ads on the chosen platform.
5. Export Your Banners
When your designs are ready for publishing, click on the Download button at top right corner to open up a menu with the available export formats.
Creatopy offers seven file formats, so you can choose the one that best suits your banner type and complies with your publishing network’s specs.
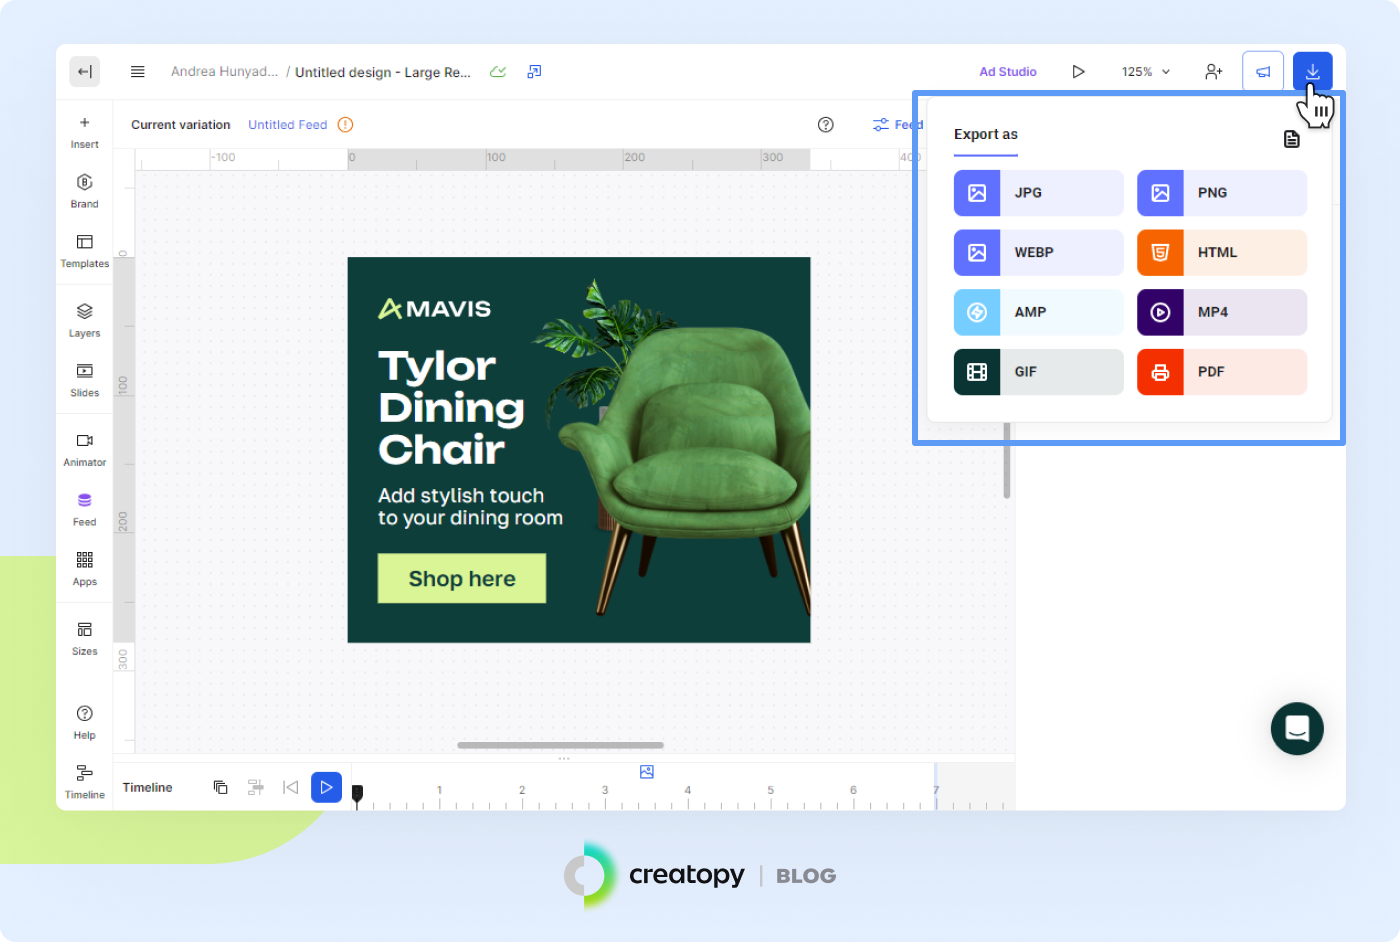
If your designs are static, we recommend you go for JPG, PNG, HTML, AMP, or static GIF. For animated banners, decide between HTML, AMP, MP4, or animated GIF.
Each export type comes with additional options like compression or scale. For the HTML format, Creatopy allows you to estimate the file size before downloading to make sure it meets your ad network’s requirements.
Don’t worry about exporting multiple designs at a time and having to sort them afterward, as Creatopy lets you customize the name of your files so you know which is which after downloading.
Pro tip: AMP is the best format choice if you want to deliver better and safer advertising experiences to your audience. Thanks to the AMPHTML technology, these ads load faster and are verified before being served to ensure malware protection.
Most Common Banner Sizes
Banners come in all shapes and sizes, so it can be tricky to decide which ones you should focus your attention on. According to Google Ads, the biggest ad network out there, the most commonly used sizes are:
- 300×250 px (inline rectangle)
- 336×280 px (large rectangle)
- 728×90 px (leaderboard)
- 970×90 px (large leaderboard)
- 468×60 px (banner)
- 300×600 px (half-page ad)
- 160×600 px (wide skyscraper)
- 250×250 px (square)
- 200×200 px (small square)
- 300×50 px (mobile banner)
If you’re curious about which are the most used banner sizes in Creatopy, take a peek at our most recent Display Ad Design Trends and Statistics article to find out.
Although the word banners is sometimes used as a synonym for display ads, not all banners are display ads. In fact, you can encounter banners on popular social media platforms such as Twitter, Facebook, or Youtube:
- 1080×1080 px (Facebook banner ad/feed image ad)
- 1080×1080 px (Instagram banner/feed image ad)
- 468×60 px or 728×90 px (YouTube banner ad/overlay ad)
- 1128×191 px (LinkedIn banner/profile cover)
- 1500×500px (Twitter banner/header photo)
- 1080×1920 px (Pinterest banner/profile cover)
- 1200×628 px (TikTok banner/image ad)
Conclusion
Hopefully, this guide helped you realize that banner making doesn’t have to be a long and tedious process that you dread to begin, but it is far from it.
With tools like the ones in Creatopy, it’s easy to learn how to make a banner like a professional designer, regardless of your level of experience, and launch campaigns at a faster pace.